Saturday, March 8, 2014

Sew..... It's official, I'm addicted

Where have I been the last month or so?  Sewing my heart out.  We had a Women's Conference to prepare for so there was a lot of sewing and such to do before the end of February.  After attending a little class on quilting techniques at the famous Missouri Star Quilt Co. in Hamilton, MO, let's just say Jenny had us hooked!  I'd made a quilt (or two, seriously....probably only two that I can remember), in the past and needless to say I had not enjoyed the process or thought it would ever be something I would find myself doing on a regular basis.  Maybe someday, as in.....when I have grandchildren to gift one to, for their GRADUATION.  Yeah, I didn't like the idea of sewing all those tiny little pieces of fabric together to come up with a greater vision.  Until Jenny.

Jenny Doan is the head honcho at Missouri Star Quilt Co. and to quote her, they are "the McDonald's of the quilt world!"  In layman's terms: she can show you how to do it FAST and EASY!!!  I was blown away by the intricate designs of the quilts she showed us and then when she explained the 'cheaters' way of doing things I knew in an instant this was something I could tackle and become addicted to.  And I did.


I've always been the type of person who has to learn by watching.  You know, kind of a hands on approach.  You see I'd read about these fancy quilts and 'easy' tutorials, but until someone showed me it didn't sink in.  After the class my best friend Joy and I headed straight to the quilt shop to buy a little stash of precuts to start some new projects.  

Then it donned on me....I could use this new found love of all things quilty to raise money for our mission trips and projects!!!  You've seen the last couple of quilts I made in the previous post.  Pretty simple, straight cuts or squares.  Yes, they're awesome, I still love them dearly, but discovering I could make something that looked like it took weeks in a matter of hours, well....that was SWEET.

So in order to prepare for the upcoming Women's Conference we were to set up at, I made a couple of baby quilts to raffle off.   And it was a success!!!  With just a small group of women in one of our hometown churches I raised about $200.  Now, that's a far cry from the price of paying for a quilt when they range in price from $75 on up, and I raffled off three of them.  But it was a nice surprise for me and I'm on a mission to make some more for the same purpose.  This love of quilting is going to take me back to Haiti and hopefully Africa very soon!

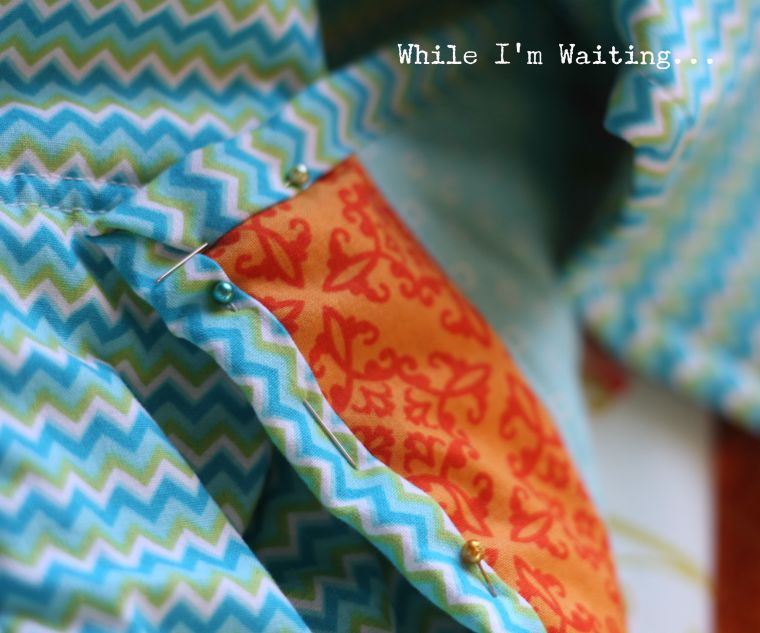
First I made this one.....

A disappearing 9 patch pattern that is SUPER simple.  I discovered the pattern for it HERE.  Surprisingly simple and I've discovered it's pretty much an awesome design no matter who you're quilting for and it looks like you spent a lot of time doing it.  This little quilt was also my first attempt at free motion quilting.  I checked out a book at the local library and after reading through it, purchasing the right foot for my sewing machine and practicing on a piece of scrap fabric I jumped right in.  It's like doodling with a needle and thread.  I LOVE it!  I wanted these little quilts finished for the event we were attending, but didn't want to have to spend anymore money on them paying someone else to quilt them.  Not to mention it can take a lot of time for someone else to quilt your projects if they do it on a full time basis.  The quilt shop I love states their turnaround time is averaging 6 weeks!  Apparently there are a lot of ladies who still love this pastime.

If you're afraid of trying free motion quilting I challenge you to give it a shot.  It really isn't as hard as everyone makes it out to be.  The best part of all, the quirky little mistakes that I notice and hopefully no one else will, give it that personal touch.  I've embraced them rather than thinking they are major disasters.  My girlfriend would agree.  ;)  She loved it so much she gave it a shot on her machine and whipped up an adorable baby blanket for a gift as well!  Yeah, we're both hooked.  lol

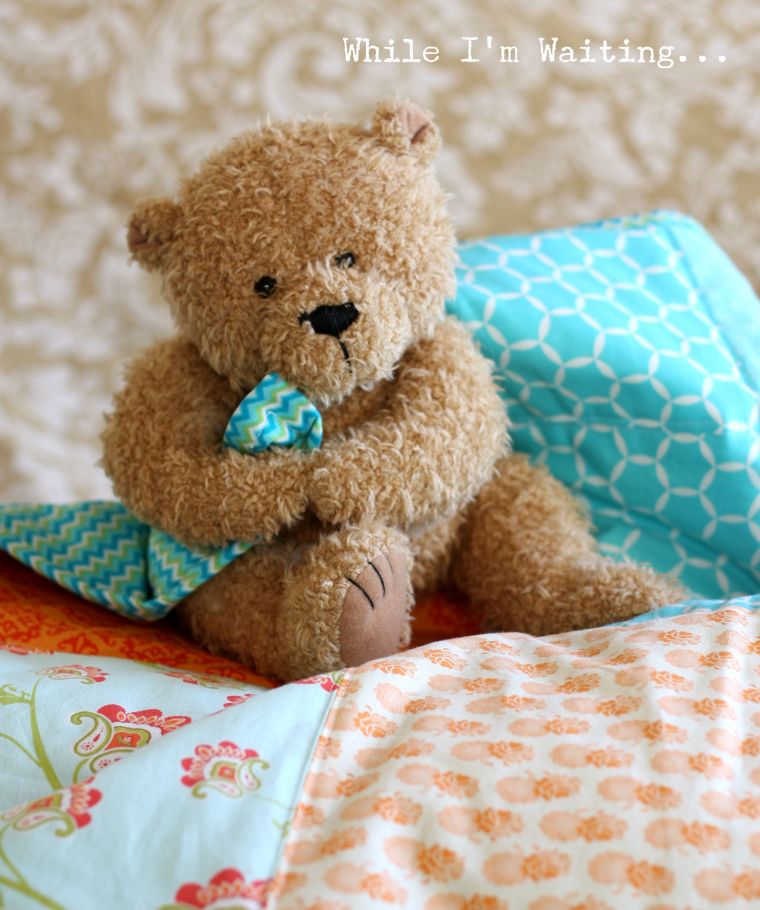
This was my next little quilt.  I found the daisy quilting on pinterest of course because I got so excited about the free motion quilting that it inspired the quilt itself.  Rather than chop up all those cute little blocks in a disappearing 9 patch I left the charm pack pieces whole and this one came together in no time flat!


Overall, I'd say our little booth was a big success!!!  At just $1 per ticket I was thrilled that I managed to raise almost $200.  I spent $8.95 on two charm packs and had some other fabric in my stash to create the borders and backing for these little quilts.  Throw in less than half a package of batting that cost around $5 and I'd say this is a fantastic little fundraiser idea!  I know you can never get paid for the time you put into a quilt, but honestly these took me just a couple of hours and praying for the cause and whoever got them during the process sure makes it go much faster.

Our booth....

We got lucky...having a metal wall behind us I just used some magnets to hang the quilts we were raffling off on the wall.  It gave everyone a chance to see them from all over the room.  With approximately 350 women in attendance it was an awesome day.

Of course my new addiction had me making a return trip to Missouri Star Quilt Co. and I picked up a Moda Layer Cake this time and decided to make a quilt for me.....which quickly turned into a quilt for my daughter.  Saying she loves to snuggle is an understatement.  The girl wears hoodies and sweats and sleeps with 5 blankets on her, IN THE SUMMER!  Seriously.  She's getting ready to graduate from college so I thought I'd surprise her.  Only she surprised us by coming home today for a visit and I couldn't contain my excitement, and I spoiled the surprise.  It only took me 2 days anyway.  I'll make another one before graduation I'm sure.  ;)


It reminds me of books and she is an avid reader.  That may in fact be an entirely gross understatement.  She never, repeat never, leaves home without a book in her hand.  It turned off a bit windy today so I didn't get more pictures, but the back of this is the dark gray (the same as the skinny strip border) with a color blocked strip of orange and a matching block from the front pieced in.  Pretty cool actually.  Can't wait to share more pics soon.  I have to take it to church to lay it out and baste it together so I can quilt the top.  I'm already on to my next project.  I found a book at Hastings and started making another baby quilt that is a spin on a traditional log cabin pattern.  Pretty neat, pretty fast.  Yeah, I like fast.  Instant gratification.

If you're in the mood to try something new, or have the same attitude about quilting as I did and want to learn the quick and easy way to make some treasured heirlooms then check out Missouri Star Quilt Co. online.  Shipping is only a flat $5!  You can't drive there for less than that with the price of gas, and she has some great free patterns on her website as well as some incredible youtube tutorials.  Serious goodness.  Check out her video for the Jelly Roll Race quilt.  I've already made 2 of those too.....  now why didn't I get pictures of that?  Hmmm......  I should start keeping a count of all the ones I make and see how large the list grows.  It's about to get crazy.  Stay tuned.

Wednesday, January 15, 2014

Ooooh Baby, Baby! Baby, Baby!

Sew, do you have that song stuck in your head now?  Oooh Baby Baby....Baby Baby....  Okay, well I do.  I enjoyed the first baby quilt I made so much that it bit me like a bug.  I had to make more!  I've pinned so many tutorials and patterns lately I thought I was becoming a rockstar by hitting my 1,000th pin.  Until my best friend pointed out she has more than that in just her sewing folder alone.  Talk about making me feel tiny.  lol  My insignificant number of pins was no match for her 5k plus.  Seriously.  The girl is a pinning wizard!

Nonetheless, I was happy to stumble upon a simple little design for a quilt that was nothing but squares.  I used to think those were too plain and simple.  If you were going to make a quilt and go to all that trouble, why not add a little flair to the project?  HA!  Those simple little square blocks sure do make a girl feel accomplished.  And that's what I needed after my pinning defeat.

Sew it began.....baby quilt number 2.


I've been in love with ORANGE lately.  It's like little bits of sunshine since it's been so darn cold and dreary where we live.  I'm so over winter!  Admittedly I could never be a 'California Girl' (for soooo many reasons), but I sure wouldn't mind living farther south.  Permanently.

The last baby quilt was teal's and orange patterns.  I thought it was yummy.  Then I played around with these prints and I'm not sure I don't love it even more.  Orange's, grays and some muted tones.  It makes me want to be a kid again and curl up in this little blankie.

I've been taking advantage of the kids' Christmas present too.  The ping pong table makes an excellent drafting area.  I can spread my blocks out and play around with patterns.  It's been so nice to have such a big space I almost, ALMOST, started to cut with my rotary cutter and then realized I wasn't on a cutting mat.  That was a close one.  I never would have heard the end of it.

This little lap quilt is approximately 36" by 48".  They seriously are great for snuggling on the couch even for grown ups.  I bought a kit once for a lap quilt for myself (which I still use daily!) and it wasn't this big.  For this blankie I used 6 inch squares, in 5 design patterns.  I had 8 of each color (double and then some on the gray 'circles' you see.  I made my rows 6 blocks wide and went 8 blocks tall.  I really had no idea how I was going to lay them all out.  Randomly I assumed, but then when I got to putting one of each color in a row (2 for the duplicate grays) it wasn't looking good to me.  Actually it was driving me nuts!  So I decided to just go with a traditional block layout and repeat the pattern in each row.  Wasn't what I wanted, but after I resigned myself to the fact I just needed to finish it and was getting disgusted I gave up the fight.  Then.... it came together.  After I stitched all those blocks and stood back to take a look, I fell in love.  :)  Yep.  Total bliss just 'gandering at all that sunshine.  


I decided top quilting these baby blankets could be done on my home machine.  After all, it's no different than top stitching a hem, right?  Straight lines, no problem.  HA!  I'm sure you could find someone local to quilt them together (actually there is someone I could have do it for only $15 and she provides the batting!  Crazy right?), but when I'm working away and feeling like I could conquer the world, who wants to let anyone else steal that joy away?  Especially when it's 11 p.m. and I want to FINISH what I'm working on.  Obsess much?

So my biggest tip to give you (if you decide to top quilt something on your own) is use LOTS of safety pins.  LOTS and LOTS.  Did I say LOTS?  Because if you don't you will have more puckers than you can shake a stick at, your project will be ruined, you'll cry your eyes out and vow never to quilt anything.  Ever.  Again.  Anyway, that's what I was thinking would happen.  But I fixed the first pucker or two I messed up on and learned my lesson.


And I'm glad I stuck with it.....because when it's all finished and you can say "I made this."  It sure does feel good.  Maybe when I've made a few dozen it won't seem like such a big thing.  Maybe.  But I doubt it.


And that 'odd' number of blocks you're gonna end up with....well, I decided to do something a little different with the back.  A splash of color just to remind you of what's on the other side.  You know, in case you forget.  Whatever.....I mentioned I stayed up late finishing this right?  So my brain is functioning on less than necessary sleep today.


I told my sister last night when I was finishing this one up (we talk on the phone all the time), that someday when I have grandbabies they are going to have the most awesome nana, who's going to make them the most awesome things.  Someday.  Until then......Sir Theodore gets to cuddle up on his cotton throne until someone buys it on etsy.  He loves them and tells me thank you Nana.  ;)


A little selfish sewing...

IMG_0300 blog
Making boutique clothing is SEW much fun and I enjoy it tremendously.  But sometimes I get a little ‘jealous’ so to speak that I’m making all these adorable things and NOTHING fits me!  ;)  Joy and I have been finding more and more designers that are making PDF patterns in adult styles and sizes and there’s a few things we’d like to make ourselves, but this selfish sew was something I knew I could whip up in no time flat and since I’ve been sick as a dog I wanted a little ‘instant gratification’.  I’d been saving these fabrics to make a quilt for our own bed, but I was on pinterest yesterday and happened to get a little sidetracked.  Imagine that.  (FYI: Pinterest is evil.  That is all.)  I starting seeing baby quilts.  And I started drooling.  And then decided to make one, weather I had someone to use it on or gift it to, or not.  So what the hey.  I’ll finish it up and stick it in the etsy shop.  Who knows maybe someone will love it as much as I do and snatch it up.  More money for the mission fund and rice and beans.  :)  Oh, and by the way….baby quilts make great lap quilts for nesting on the couch or your favorite comfy chair while watching a movie.  And I secretly have to confess that I still sleep with a lap quilt (that I made myself).  For whatever reason I love to have something to snuggle in my face and cover my head with when I go to sleep.  True story.  I even took it to the hospital once upon a time when I had to have surgery.  I packed it all the way to Haiti with me, and even take it on trips or vacations when I get to see my sister.  Something about sleeping with a little piece of home and the smell of my blankies and bed that makes life so much better.
20140101-120048.jpg
Please excuse the poor cell phone pic, but I was so excited to snap a pic when I got it pieced together that I couldn’t wait for the finished product.  I laid it out on the ping pong table (after I interrupted the kids’ game) and took a quick snapshot.  There is something about turquoise and orange that just melts my heart.  Seriously.  Not to mention I’m such a huge fan of all things retro and it seems more and more fabrics are going back to traditional designs of old.  The retro floral prints are beautiful but those big geometric shapes and damask details are what makes my heart go pitter patter.  Someday I’ll have grandchildren.  Hopefully.  (According to my children I’m out of luck in that regard, we shall see.)  So until then, I’ll just craft up something sweet and share it with the world.  I’ll get a better picture when it’s all finished.  In the mean time, I better get back to the sewing room.  I have a dress to finish for a designer by Friday!  I should probably be past the ‘cutting-of-the-pattern’ stage by now. ;)  Yeah.  That’d be good.
IMG_0302 blog copy
If you like this design and are looking for a pattern, good luck.  Let me know if you find any free tutorials.  I wanted a strip quilt and found a gazillion finished pics and products, but didn’t want to pay for a pattern so I made my own.  (I’ve mentioned before how much I hate math.)  I googled the dimensions for a standard baby quilt and went to work with some scratch paper and a calculator.  Who knows, maybe I’ll design and make a PDF Pattern for it and sell it online as well.  I hear there’s a market for that. ;)  Until then I’ll share it with you all for FREE.
Number of Pieces Needed & Dimensions in Inches:
  • 2 – 4 x 20
  • 2 – 4 x 11
  • 2 – 6 x 20
  • 2 – 6 x 11
  • 2 – 10 x 20
  • 2 – 10 x 11
  • 1 – 15 x 20
  • 1 – 15 x 11
  • 1 – 6 x 55
Be sure to lay out all your pieces before you go sewing them together so you have them in the right order and laying in the right direction.  Pretty easy to do from scrap yardage.  All the cuts I used in my quilt were less than 1 yard pieces.  I did have to piece the 6×55 inch strip together with two pieces, and I matched up the seam with the side seams of two of the horizontal strips.  I’ve yet to make the binding and want to find just the right piece for a backing (which you should be able to figure out what size to get for that after you piece your top together), but I’m excited and can envision just what it will look like all done and wrapped around someone’s little chunker in a snuggle fest.  I plan on just quilting it with straight stitches to match the blocks.  I’m anxious for my girlfriend to buy her new quilting machine with her income tax refund! ;)Then I’ll just pay her a nominal fee for thread and electricity and we’ll have sew much fun stitchin the days away!  Can’t wait.
If you make a strip quilt using this little ‘tutorial’ of sorts, please link it up in the comments and post pics!  I’d LOVE to see them!
*update* So I thought I’d share with you how this little jewel turned out!  I’m totally in love with the colors.  And, sadly, since I have no grandbabies yet or friends to share it with, it went up for sale in the etsy shop.  You can purchase it HERE.  Or click on the shopping link in the menu to see it and other items.  :)  And just in case you noticed (or didn’t and I’m pointing it out now….) I ended up cutting off one of my end strips and cut into the opposite one as well.  I found the perfect piece of chevron fabric in my stash to back this little quilt with and needless to say it was just a few inches short of what I needed.  Sew I chopped off the ends a bit.  I think it’s still beautiful and melts my heart every time I look at it.  How ’bout you?
IMG_0310

Tuesday, January 14, 2014

Peek-A-Boo Baby!

It's no secret I have a passion for sewing.  But when you pair that with some incredible patterns and tutorials you can really be amazed at what you can create!  The brilliant minds that are behind the scenes really don't get enough credit.  They design of all things you make and get compliments on from your friends and family, and you say thanks!  I made it myself!  Which is no lie, and it's an awesome feeling to say that...but I really wish there was a way to just flip a card out of your pocket and say, "HERE!  Check this out!  You think I did an awesome job, go buy one of these patterns and YOU too can look like a seamstress genius!" lol

The only reason I say this, is because there are sew many pattern designers out there that we tend to lean toward our favorites over and over again.  The ones with precise, clear, easy-to-read instructions.  With LOTS of pictures. ;)  For us visual learners.  I despise reading instructions.  I think I have too much testosterone in my system.   You know...it's a man thing.  Skip the instructions, don't ask for directions.  But I do put the cap back on the toothpaste for those who are wondering.

I had the privilege of testing another pattern recently from one of my favorite, if not THE favorite at the top of my list: Peek-A-Boo Pattern Shop.  Amy has the most awesome patterns and they make you really feel like a pro and your kids looks stylish.  The new Baby Bundle is adorbs (as my teenager likes to say, that's adorable in adult english).  I was chosen to make the baby gown and it was such a fast and simple sew.  So fast, I forgot to take pictures of how I made it!  :(  Seriously.  I used a Gap t-shirt I had in my upcycle stash to make the cutest little pink jersey nightgown for a friend's baby girl.  And she loved it.

If you like sewing with knits and jersey, and need something simple and fast for a baby gift or to add to your own nursery wardrobe check out the Peek-A-Boo Lullaby Line!  The bundle gives you discounted pricing over purchasing the patterns individually.  And we all love a good sale, right?!  Check it out!  (And I promise....the next project I make will have pictures.  I won't forget.)


Friday, January 10, 2014

Did you say FREE

Why yes! Yes I did! It seems there's not too much in life that's free anymore, but when you find something awesome you have to pass it along.  Right?  For the love of all things craftsy and fun I couldn't keep this one to myself.  When I've got sew many friends (pun intended) that love to quilt I knew I had to link you up!  Don't worry, there's tons more resources on the page for other crafts too.  Just click any of the photos to sign up for these online classes for free!  There's even an app for that you can see on the website so you can take your classes with you and watch on your ipad or phone!  (yep, I'm an apple junkie.....)


It's a short and sweet post for today.  I'm working on some photoshop projects and stumbled across these and knew I had to get them posted.  I tend to squirrel out of control at times so I must act when the urge calls.  You know, because I might not come back to it until 2017.  Happy Friday and Happy Sewing!